EVERYDAY NATURAL MAKEUP LOOK

EVERYDAY NATURAL MAKEUP LOOK


2


For my everyday go-to makeup, I try not to use many products or create a “heavy” look. I am a fan of the more natural look that basically enhances my characteristics instead of altering them or hiding them. Therefore I don’t really use bright or dark eyeshadow, however, from time to time I pick a red or a fuchsia lipstick because I like adding a pop of color to the natural look. Having a simple makeup look is also great for transitioning from day to-night by touching it up and making it a bit bolder. If the look is too strong already, I don’t think it differentiates from a nighttime look. The look I share with you guys, is one of my favorite for everyday because it is simple, it brightens up my skin and makes it look youthful, dewy and fresh. I love rose gold, nude and brown/mauve shades so most of the looks I create revolve around those colors. Now let’s get started shall we?

yes

Step 1 – Face

When doing my makeup, the most important thing to me is to create a flawless base. Therefore, I use more products and effort for my face than my eyes or lips.

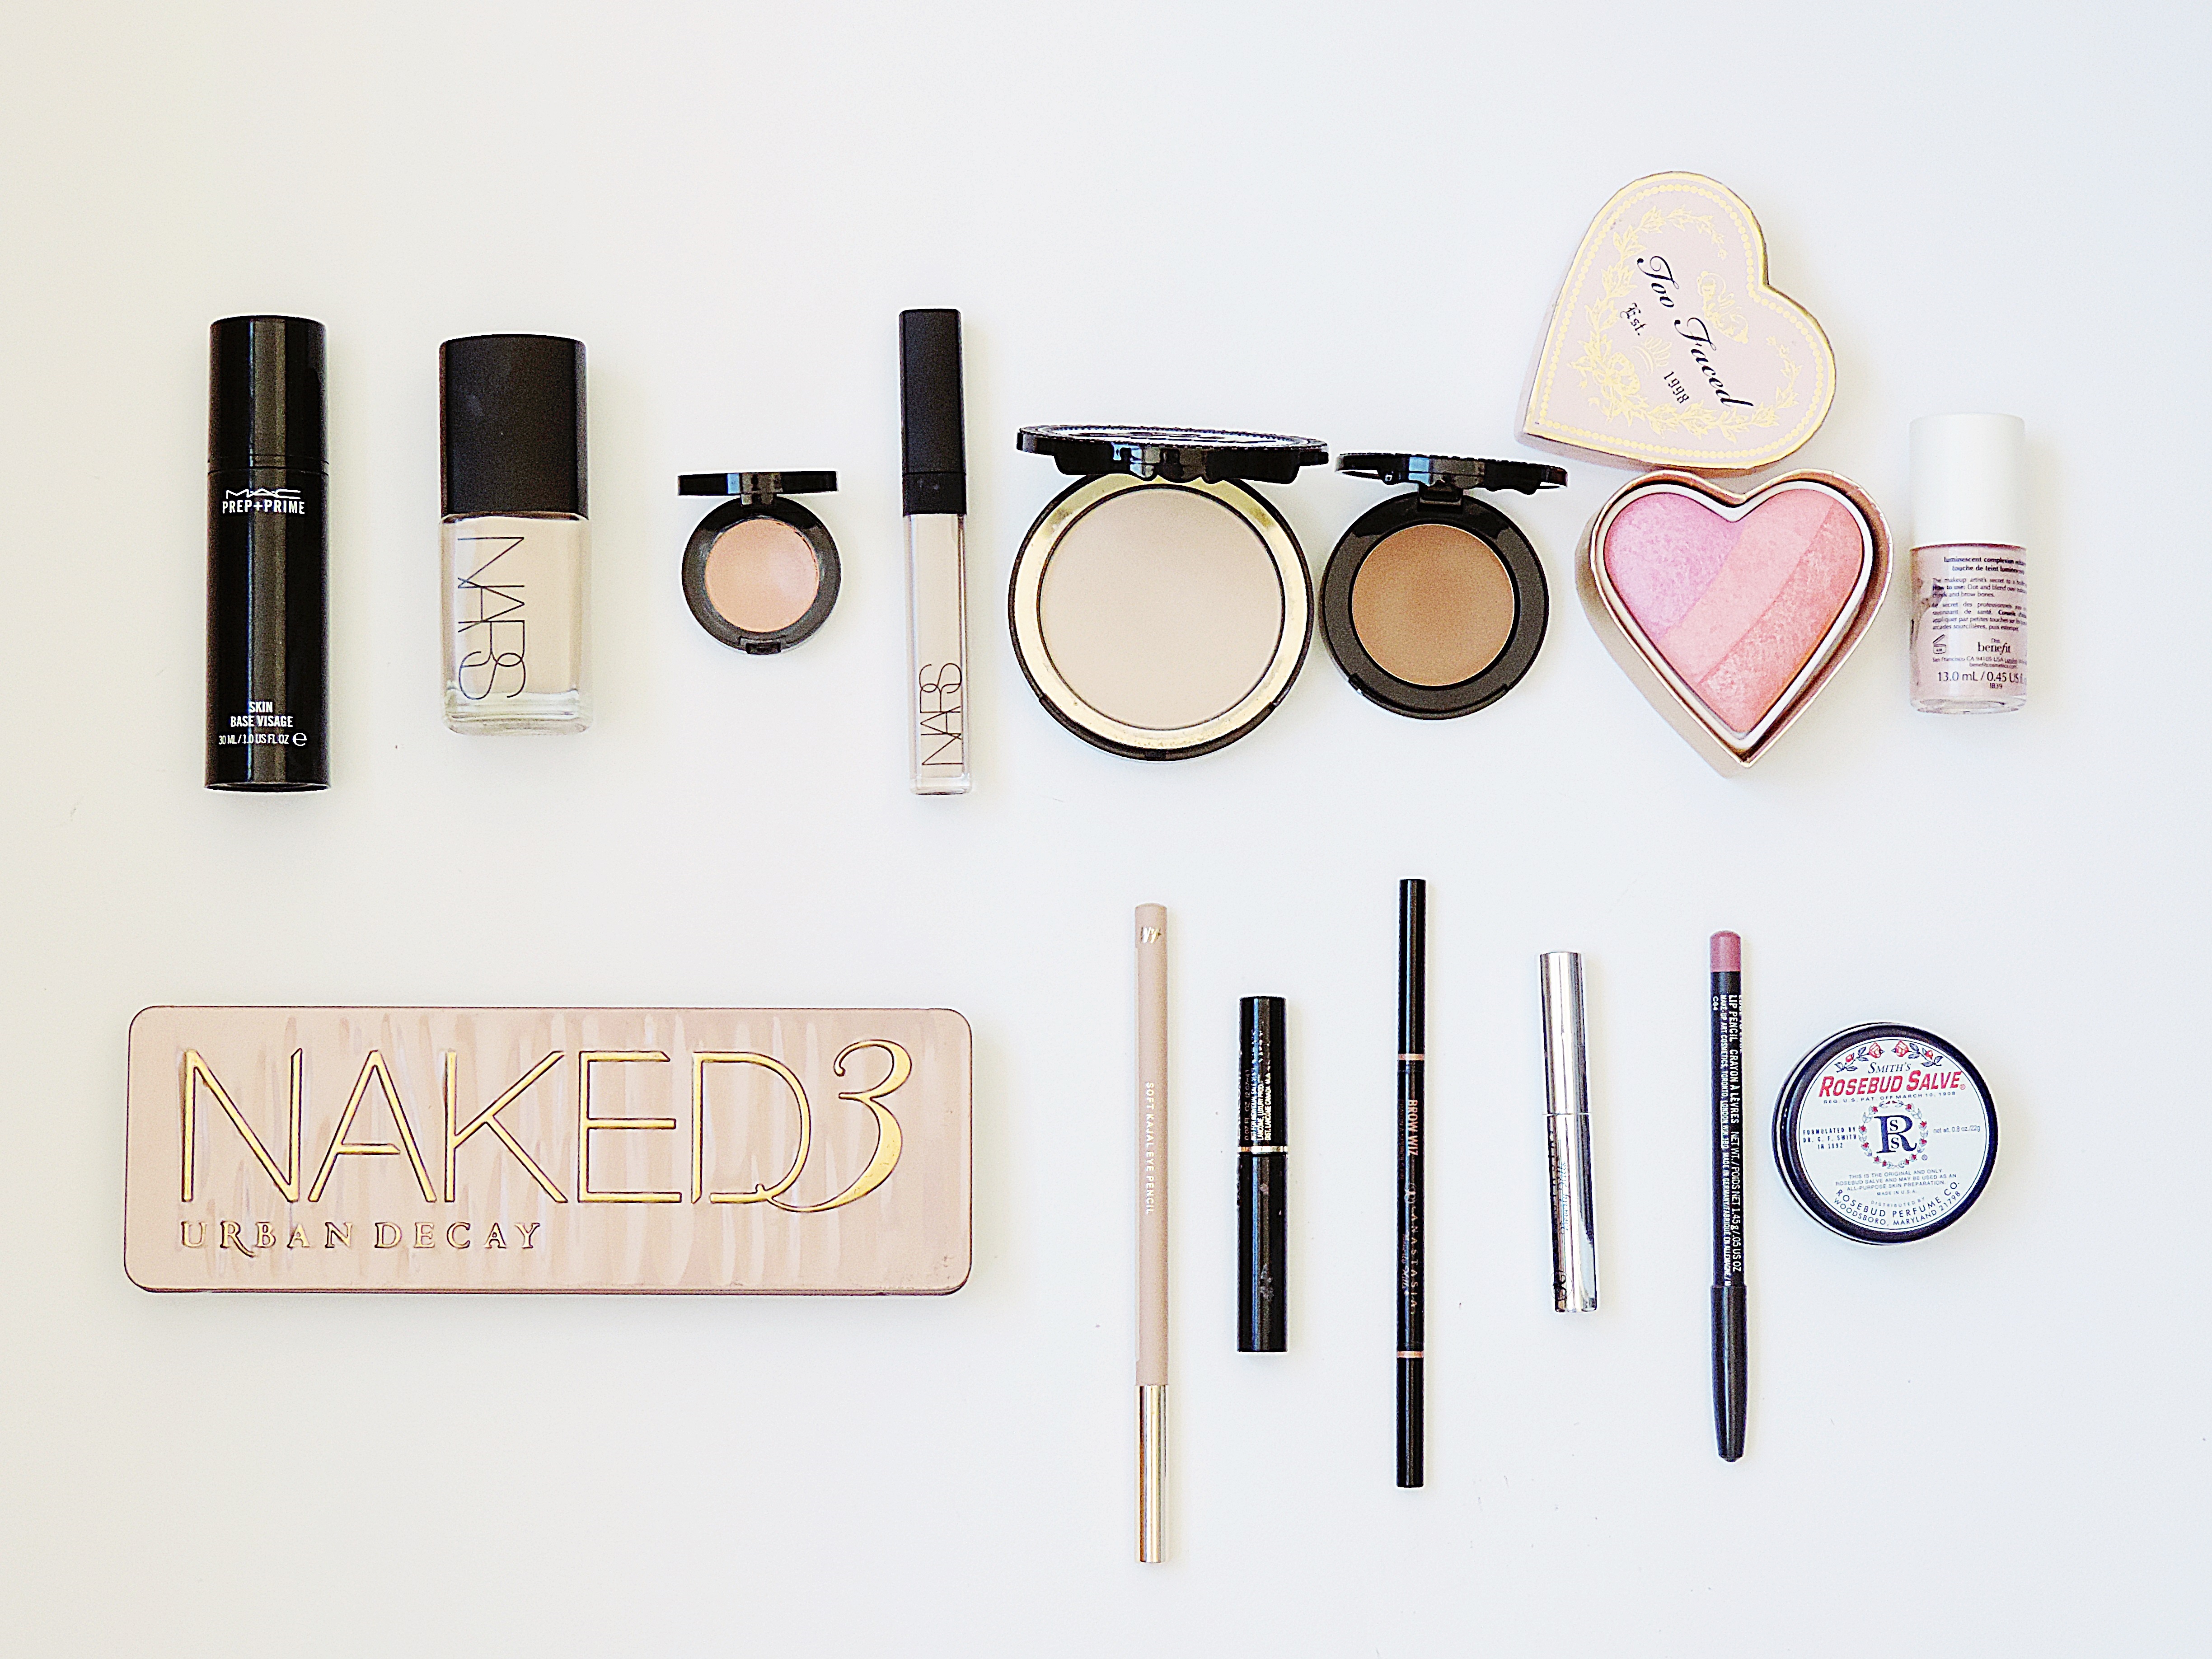
  • MAC Prep and Prime primer (on face and eyes)
  • NARS Sheer Glow foundation in Mont Blanc
  • Bobbi Brown Corrector in Bisque
  • NARS Radiant Creamy Concealer in Vanilla
  • Too Faced Cocoa Powder foundation powder in Fair (for setting)
  • Too Faced Sweethearts Blush in Candy Glow
  • Benefit Cosmetics Liquid Face Highlighter in High Beam (on cheekbones, nose, brow bone and cupid’s bow)
  • Too Faced Bronzer in Chocolate Soleil (for contouring)

Step 2 – Eyes

Before I am going for a natural look, I like to use nude/light brown or rose gold/pink eyeshadow. I don’t like to use too many different shades as it kind of cancels the whole simple purpose of the look. Once I am done with the shadow and mascara, I do my eyebrows. I always do my eyebrows, even when I don’t use any shadow on my eyes at all, as I believe the eyebrows to be the most important facial characteristic. They frame the face and give structure to it. Well groomed eyebrows can make a huge difference to the way someone looks. Therefore, my biggest makeup advice would always be: never omit your eyebrows!

  • Urban Decay Naked 3 palette shade Strange (as a base all over my eye and eyebrow bone – perfect pink/white)
  • Urban Decay Naked palette 3 shade Burnout (on my lid as the main color – gorgeous metallic rose gold)
  • Urban Decay Naked 3 palette shade Limit (as a blending shade to soften the look and also apply on lower lash line – great matte pink/brown)
  • Lancome Definicils Mascara
  • H&M Soft Kajal Eye Pencil in Pale Nude (on the waterline to brighten up the eyes and make them look bigger)
  • Anastasia Beverly Hills Brow Wiz pencil in Medium Brown (for the eyebrows)
  • Anastasia Beverly Hills Clear Brow Gel (to set the eyebrows and blend them out a bit)

Step 3 – Lips

For my lips I don’t have a specific routine as they are my favorite part of my makeup. I like being playful and bold but I also like being subtle and natural. I know it sounds complicated, but basically I can wear anything on my lips. From liquid lipsticks to lip pencils and from burgundy to pink. For this look I decided to go for pink since there is rose gold on my eyes.

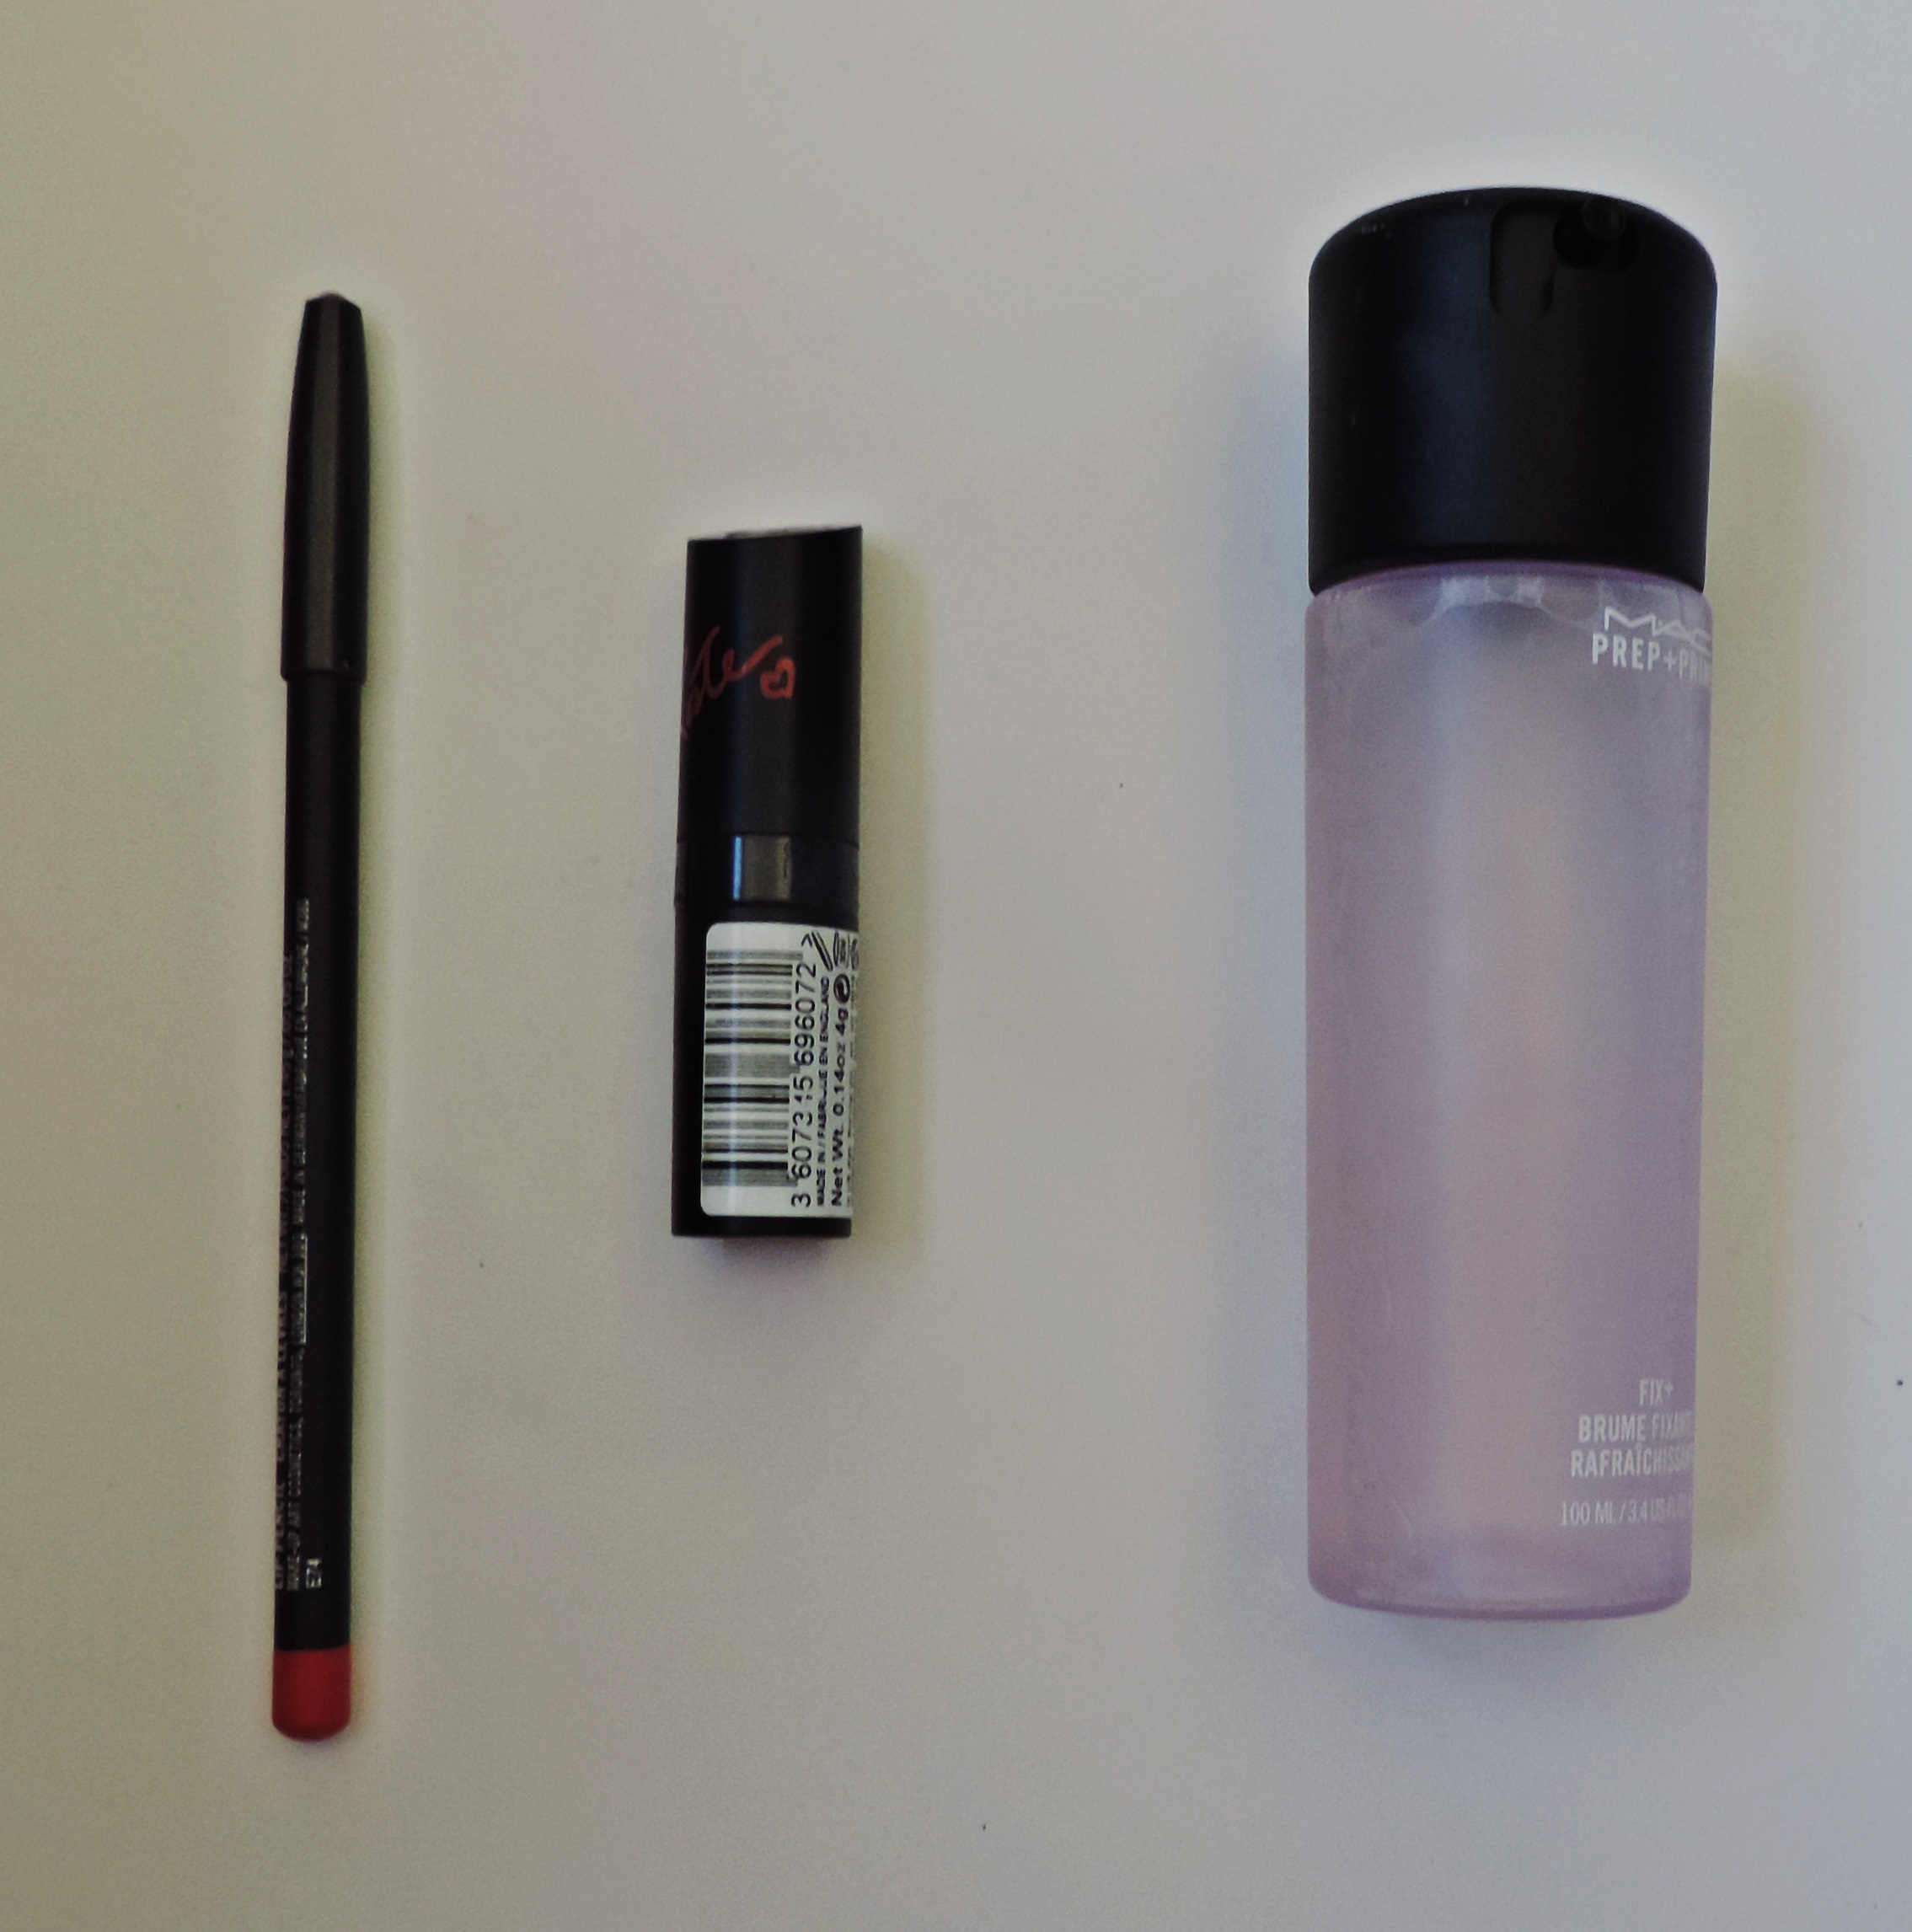
  • MAC Lip Pencil in Edge to Edge (I trace my natural lip line and then fill them in as well – perfect medium pink shade)
  • Rosebud Perfume Co. Lip Balm in Rosebud Salve (I mix it with my lip pencil to create a glossy, plum, natural lip plus it moisturizes the lips)

For my everyday makeup look, I prefer to use natural, soft shades that enhance my face and make it look fresh and bright. I don’t like to use many products or bold colors as I am usually going for a natural, simple look. For the makeup look I shared with you, I used light brown, rose gold and pink shades, as they are girly and perfect for spring. Comment below and share your favorite daily makeup looks. Also don’t forget to connect with me on Instagram (@vogueandmacarons) and Twitter (@vogueandmacaron)!

Till next time take care dolls 😉

Vicky x

FESTIVE MAKEUP LOOK

FESTIVE MAKE UP LOOK


gher6

Hello lovelies! I can’t believe Christmas is just around the corner! I am so excited thinking of all the food and sweets and just how fun that day will be. For a festive day like this, a festive look is appropriate. However, I am not a huge fan of extravagant makeup looks; I mostly like subtle yet glamorous makeup that does not look heavy on the face. I really like the old school Hollywood stars make up, where lips are the centre of the entire look. For this festive Christmas look, I will go for shimmery eyes but not too loud, and for bold lips. I am torn between red and purple, as I love purple lipstick a lot however, I believe red lipstick puts the F in Festive! So let’s get started shall we?

The face

face

In order to look extra glamorous and fresh on Christmas day, I moisturized my face using Charlotte Tilbury’s Magic Cream. I really love how smooth and hydrated my skin feels afterwards. Then I used MAC’s Prep and Prime primer to prime my face so the makeup will not crease and stay in place for the day. In order to achieve a dewy base, I used a tiny bit of my Nars Sheer Glow foundation in the shade Mont Blanc, which I applied with a damp sponge. For under my eyes, I used my Bobbi Brown Corrector in the shade Bisque to cover my dark circles, and then I applied my Nars Radiant creamy concealer in the shade Vanilla. To set the base I used my Rimmel Stay Matte powder in the shade Transparent. Once everything is set, it’s time for the highlighter and blush. For blush I used MAC’s Breath of Plum because I find it a lovely winter color that ties well with gold shimmery shades. For highlighter I used my Physician’s Formula “Natural Nude” palette. I love this multipurpose palette and especially the top white colors for highlighting. I applied the highlighter on my cheekbones, inner eye corners and my cupid’s bow. I am not a huge fan of contouring and bronzing however, I used my Anastasia Beverly Hills contour kit palette to bring some warmth to my pale face. I used the middle bottom shade because it is perfect for very pale skin, and I applied it on the hollows of my cheeks and my forehead; but only a little because I didn’t want to end up with darker face than body. And with that the face is finished.

The eyes

eyes2

Moving on to the eyes, I went for a shimmery yet subtle look. I wanted to keep the eyes bright and glamorous but not very strong as to overshadow the lips. To create the festive look I was going for I used two of my favorite palettes: Naked 2 (p1) by Urban Decay and Everything Nice (p2) by Too Faced. These palettes are extremely pigmented, which means you really need a small quantity each time on your brush. First I applied the color Turtle Dove (p2), which is a creamy matte white, all over my lid and up to my brow bone, in order to create the perfect base. Then from the first palette (p1) I used the color Bootycall (I know right?) on my lid. This is a nude-peachy metallic color, which is going to deepen my lid a bit.   Then, from the second palette (p2) I applied the color Shinny Happy on the centre of my lid. This is a shimmery, cool toned gold. It sets the base for the glamorous part. With a fluffy brush I blended the color Suspect (p1), which is a silvery gold, on the edge of my crease to brighten the eye a bit. Lastly I used the color  Don’t Settle (p2), which is a brown-gold color, on the outer corner of my eye and all the way to the middle, to make the look a little bolder and tie everything in. On the inner corner of my eye, as mentioned before, I used my highlighter. On my lower lashline, I used the color Don’t Settle (p2) to enhance the look and make it a little more dramatic. I am not a big fan of liquid liner or eye liner in general, because I feel it looks heavy on my droopy eyes. Therefore, I choose to use a black eye shadow with an angled brush and I create a small wing which I bring to the middle of my lid and smudge it a little bit. I also connect the wing to my lower lashline until the middle as well. I don’t use fake lashes as I am rubbish at it however, I love mascara! I curled my lashes with my H&M curler and then I used Bobbi Brown Smokey Eye mascara. It makes the lashes longer and much fuller, perfect for a festive look. Of course we should never forget our eye brows. My eye brow routine is very simple. I brush them with a spoolie, then I fill them in a little with my Anastasia Brow Wiz in Medium Brown and I set them with a clear brow gel.

The lips

lips

Last but not least, the lips. Remember the lips are the centre of the whole look. It’s the holidays so I decided after some conflict to use a lovely bright red lip color. First I muted my lips with some powder and then I used my MAC lip liner in Ruby Woo to line my lips slightly. I don’t go over my lips with my liner; I simple go over my natural lines and accentuate my cupids bow. I absolutely love red lipsticks. For this look I wanted a bright red but not orangey, so I used Rimmel’s Kate Moss number 10. Such a beautiful creamy red! It is not very matte or very glossy. If you want to go full on, then you can add some red or even clear lipstick on the top. To make sure my makeup will last and look amazing after a couple of hours, I set it with MAC’s Fix Plus spray.

I love how festive this look is, without being over the top. The eye makeup is a cool toned gold, paired with a bold and bright red lipstick. It is a look that can carry you throughout the day and night. You can have it on the Christmas table and the bar you might pop at night. It is flattering for everyone, as you can never go wrong with a red lipstick. I hope you like the look as much as I do. If you recreate it, share it on Instagram (@blueberrylover) and Twitter (@vickyinlalaland) with the hashtag #myshinyxmas.

Till next time take care dolls 😉 xxx

Vicky

MAC, NARS AND TOO FACED LIPS

NARS, MAC AND TOO FACED LIPS

blog 7 021

Lipsticks are my favorite part of my makeup. Whether it is  a casual day or a fancy occasion, I love going natural and topping it off with a bold lipstick. A flawless face is the perfect base for any lipstick color, especially the ones that are a statement on their own. In the past, almost all my lipsticks were MAC, however, this last year I have discovered brands such as NARS and Too Faced (yes I was living under a rock) and I have fallen in love with them. In this post I am going to share with you guys my favorite lipsticks for this season from each brand, and I am also going to review and compare them to each other. Keep in mind though that all these brands have a place in my heart!

MAC is an old-time favorite brand. I have been using it for quite a few years and I can admit I am a loyal follower. I own many lipsticks (over a dozen), in different colors and of different finish. Although my favorite finish is matte, as I like how soft it is and how it stays put no matter what, the lipsticks I enjoy the most this season have a satin or lustre finish.  These two different types of finish, are the opposite of matte; they are creamy, sheer and a little glossy. The two shades that are my must for this fall, are Amorous and Plumful. Plumful is a beautiful, rose-plum, creamy lustre and Amorous is a gorgeous, cranberry, sheer satin. Both of these shades are perfect for autumn, as dark red and purply rose are this season’s IT colors! MAC lipsticks are easy to apply, have a great color payoff and are quite long-lasting. Also they don’t really stain the lips and they don’t sit on the natural lines of the lips. At the affordable price of 17$, I highly recommend them.

Although I love MAC to pieces, it is not the only brand I have in my heart anymore. Once I read some amazing reviews on NARS Audacious collection of lipsticks, I knew I had to get my hands on those. Therefore, when I got the chance, I added 4 of them to my collection. From those 4 shades, my two favorite ones for fall are Audrey, a beautiful red currant shade, and Anna, a lovely smokey rose shade. These lipsticks, although they have a somewhat satin finish, they are not sheer at all. On the contrary, they have an amazing color payoff, last forever and feel so smooth and silky on the lips. I don’t know what is it about their formula but it is the best formula I have ever tried on my lips. However, they are on the pricey side, as – at 32$ – they are almost twice the price of the MAC lipstics.

Last but not least, another brand I love is Too Faced. The Melted Lipsticks collection is one of my favorite ones and I do own a few shades of those. The ones I love for fall, would be Melted Peony and Melted Berry. The previous is a lovely dusty rose, perfect for a casual neutral day, and the later is a berry red, that literally goes with everything, as it enhances my natural lip color as if I am wearing a tinted lip balm. What I like about them, is that they are different to everything else I own; they basically are liquified lipsticks. However, they are not glossy and sticky like most liquid lip products but more like proper – in the bullet – lipsticks. They are matte and blend in such a wonderful way with the lips. They are very sturdy and last for hours. However, they do sit on the lip lines or dry patches and the Melted Berry, stains the lips a little bit. I wouldn’t change them for the world though. Especially the Melted Peony, is the best pink lipstick I have found, because it actually blends on my lips without fading (my lip color is on the red side). They are also very affordable as they are 21$.

Lipsticks are very versatile products, as they can stand on their own on a bare/natural face or complete an entire full-on look. Plum, berry/burgundy red or even some dusty rose, are the colors that represent this season. They channel the decadence this season is all about; falling leaves, cold weather and cloudy skies. All of the brands mentioned above, have some pretty amazing lipsticks in some lovely shades. Each one has a different style and purpose; NARS stands for luxury, Too Faced for comfort and easy, and MAC for diversity with all the different types of finish that provides. Depending on what you are looking for, I would suggest to go for NARS if you don’t mind splurging a little bit as it has the best and consistent formula out of the three; if on the other hand you want something professional but quite affordable you can never go wrong with MAC. Lastly, if you are looking for something more natural and wearable for every day, Too Faced  would be the perfect choice. Prices differ a lot but so does quality. Overall, they are all really lovely and you will be satisfied no matter which one you’ll choose. Comment down below and share your favorite lipstick brand and shade for the fall!

Till next time take care dolls 😉 xxx

Vicky

HOW TO CHOOSE THE RIGHT FOUNDATION

HOW TO CHOOSE THE RIGHT FOUNDATION

Photo credit www.dailymail.co.uk
Photo credit: www.dailymail.co.uk

One of the most important elements of my makeup is foundation; it is the base that the whole makeup will be set upon. The foundation turns my face into a blank canvas for me to play with the colors and create something that expresses me. As much as I love my foundation, it took me a while to choose the right one, as it is a quite complicated process (yes it is!) You have to decide how sheer you want it to be, what will be its finish (matte, velvet etc), which form do you prefer (cream, liquid, powder etc), what is better for your skin (water-based or oil-based), and of course the shade that suits you better.

Level of coverage

The first thing you have to consider before choosing your foundation, is how sheer you want it to be. You can go for high, medium or sheer coverage. The level of coverage is usually based on what do you want to cover on your face: blemishes, acne, scarring etc. The bigger the issue the higher coverage you should seek. Since I have fairly alright skin, I opt to go for a sheer coverage, as I don’t like my foundation to feel heavy on my skin. Therefore, I prefer a light foundation that basically evens out my skin tone. My personal advice, would be to go for the lighter you can as foundation will always weigh on the skin. If you don’t have a major issue you wish to cover up, go for medium coverage or even sheer.

Finish    

The foundation finish could be matte, pearl/luminous or velvet. It is your choice of how you wish your face to look. I prefer my skin either matte or luminous, however, luminous finish looks better on younger skin than older which looks better matte. Also I don’t go for too luminous and shiny foundations, as I don’t like my combination skin to look oily and sweaty after a few hours.

Liquid, powder or cream?

As if picking the right foundation wasn’t hard enough already, there is a variety of forms that makes the choice even harder. Powder foundations (Too Faced Cocoa Powder Foundation is amazing) are usually light and have a velvet finish. They could also be full coverage (Studio Fix by Mac). Many of them contain minerals, which are perfect for oily skin with breakouts. Liquid foundations vary from medium to full coverage and are ideal for combination or dry skin. The cream foundations (Extra Repair Foundation by Bobbi Brown) are usually full coverage and perfect for dry skin like the liquid ones. After assessing your skin and what it needs, it is not that hard to decide which type will work better for you. I love liquid foundations for my combination skin and sometimes powder ones for a light coverage.

Water-based or Oil-based?     

Now this is something quite tricky that you have to ask about on the makeup artists before picking your foundation. Water-based foundations give a more sheer and natural look, which is perfect for pretty much everyone who has fairly nice skin that needs some extra boost. The oil-based foundations are better for dry skin as dry skin lacks of moisture which the foundations replenish. I absolutely love Maestro Fusion foundation by Armani which is water-based and it has the softest and most velvety finish ever. One day it shall be mine!

Shade 

Last but not least is the choice of the proper shade that matches your skin perfectly. In order to find the right shade you must try it on your collarbone or neck and not your actual face as we do want the shade to match our neck skin tone so we won’t be two toned! Also, you need to try the foundation on your skin on natural and not artificial light for the truest result. If your skin has a pink undertone then you need a cool tone shade and if it has a yellow undertone then you need a warm tone shade. If you have both then you need a neutral shade. So based on your undertone, you pick either a cool, warm or neutral foundation which then you try on your neck under natural light. That way you will find the best shade for your skin.

Tips for applying the foundation  

You can apply your foundation with a brush, a sponge or your hands.  I don’t prefer using my hands as I feel they make my skin dirty. Therefore, I use either a sponge or a brush. I love using both depending on the finish I like to get or the time I have in my hands. Using a beauty sponge gives a more matte and natural finish whereas a brush does not blend as much and sometimes you can see the bristle marks on your skin. However, a brush the most appropriate for powder foundations. While using a brush with a liquid foundation, you should pat/press it on the skin instead of wiping or brushing it on. On the other hand, when you apply powder foundation, you should load the brush, tap the excess product off, and then apply it on your face from outside working your way inwards in circular motions.

Choosing the right foundation is usually a complicated process that raises a lot of questions; “Does this color make me too dark or too light?” or  “Does it make my face look oily or too dry?”. Following the steps mentioned above, will make the whole process easier and fun! Don’t forget to ask for help from the makeup artists but always trust your own opinion. Makeup is supposed to make you feel and look better without hiding your real self! I hope my tips will be helpful for you guys! Please comment below and share your on tips and advice on how to choose and apply the foundation. Also don’t forget to follow me on Instagram (Blueberrylover) and Twitter (Vickyinlalaland).

Till next time take care dolls 😉 xxx

     Vicky