DIY CHANEL INSPIRED LAMP
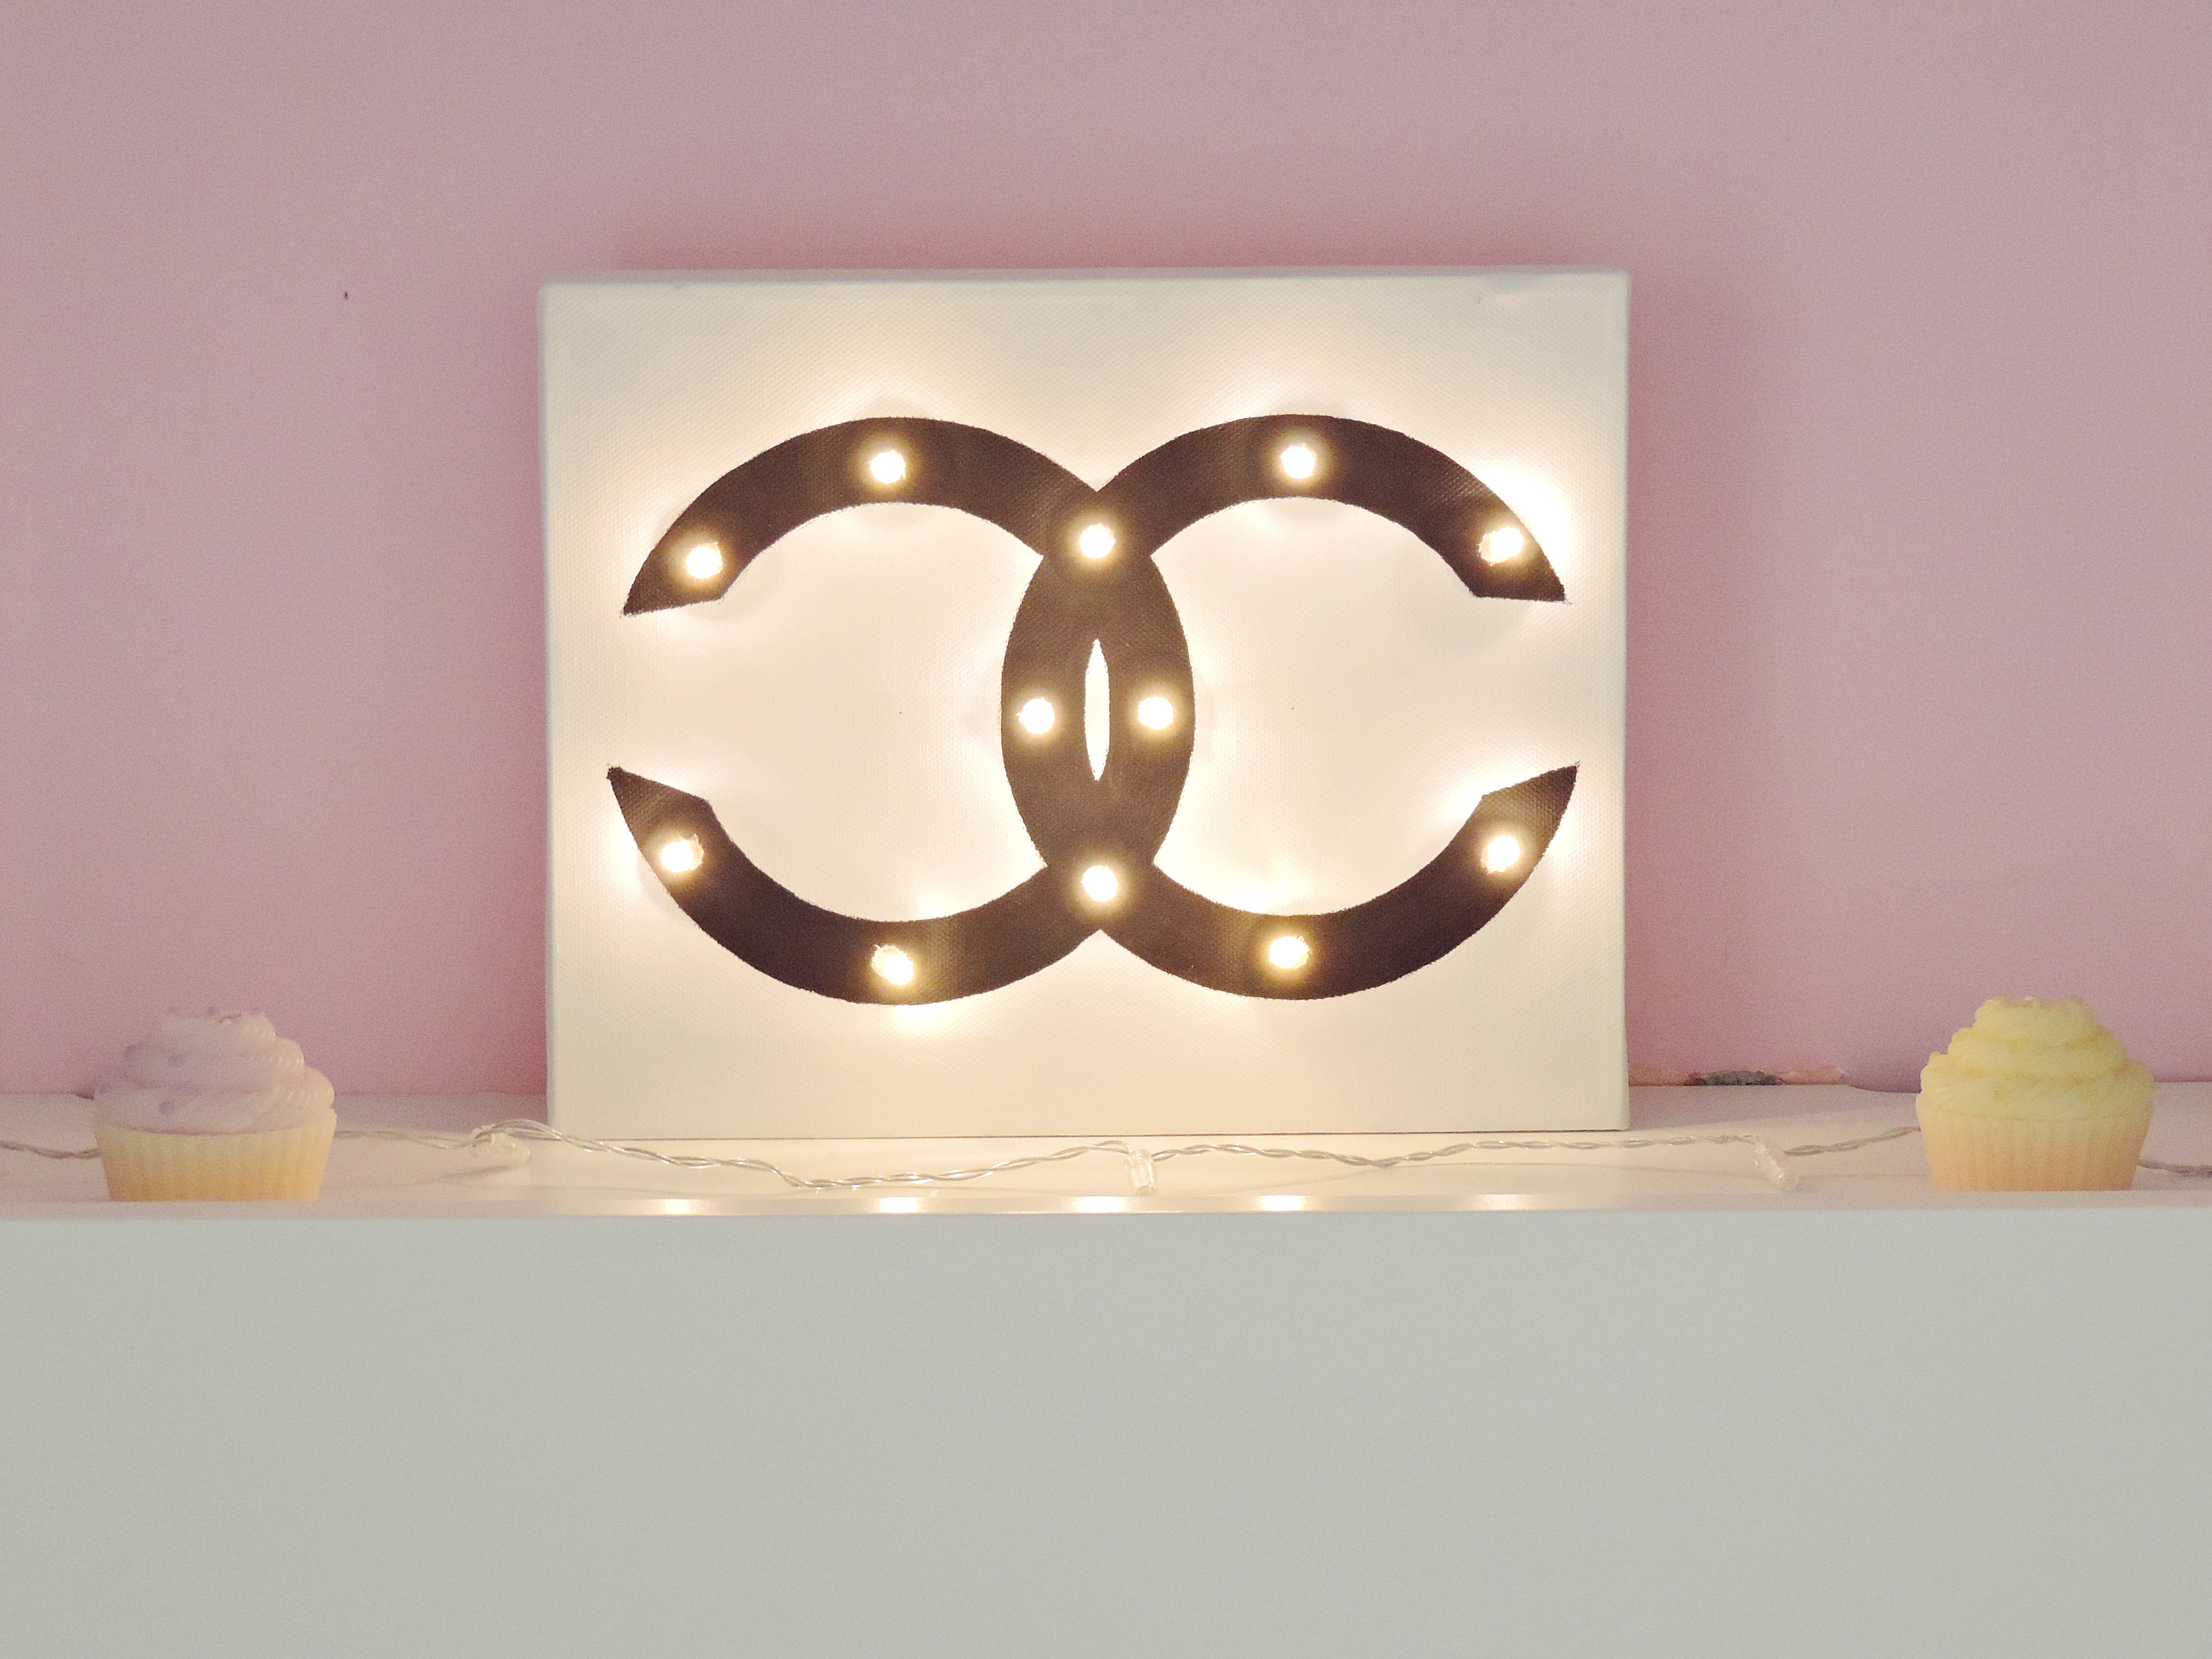
Hello lovelies! I never was a craft-friendly person. I am terrible at drawing and at anything that involves glue, scissors and paint. Therefore, I am not very good at DIY projects, not matter how I excited I am and willing to give them a try. With that in mind, once I found a picture of this Chanel inspired lamp on Pinterest, I instantly fell in love. It is a cute little lamp that can totally transform a plain room and add some character to it. As a fashion blogger, I love anything that is brand related; from mugs and candles to pencils and paintings. This lamp although it looks easy and simple enough to make, it was a bit of a challenge to someone who hasn’t been into DIY projects much. I only just recently started to warm up to the idea of creating bits and bobs on my own for my house.

This lamp is quite easy to make and not demanding at all. You will need a canvas (I chose a rectangular one because I feel it is better for the design and also with some width), some black paint, a brush, a pair of scissors, some LED fairy lights (mine are a 12 pack from IKEA and they are battery-powered), a ruler and a pair of compasses.
STEP 1

For this step you basically design your entwined Cs. Use your ruler to measure the distance of your two Cs from the sides of the canvas. You have to be very specific and careful with your measurements because the Cs must be mirroring each other. After you measure the space and decide where you would be happy with your Cs, use your pair of compasses to design them. It is much easier than what it seems, trust me!
STEP 2

Once you have designed your Cs then you need to paint them. I used an acrylic black paint and I mixed it with some water. I didn’t mix it too much because I like the paint to be a bit on the thicker side. Gently and using a small brush paint the two Cs. It doesn’t matter much how you are going to paint them, but it will look better and less messy if the strokes have the same direction. Once you finishing painting the Chanel logo, let the canvas dry. It will dry pretty fast but I let mine for a couple of hours, just to make sure and to avoid making smudges.
STEP 3

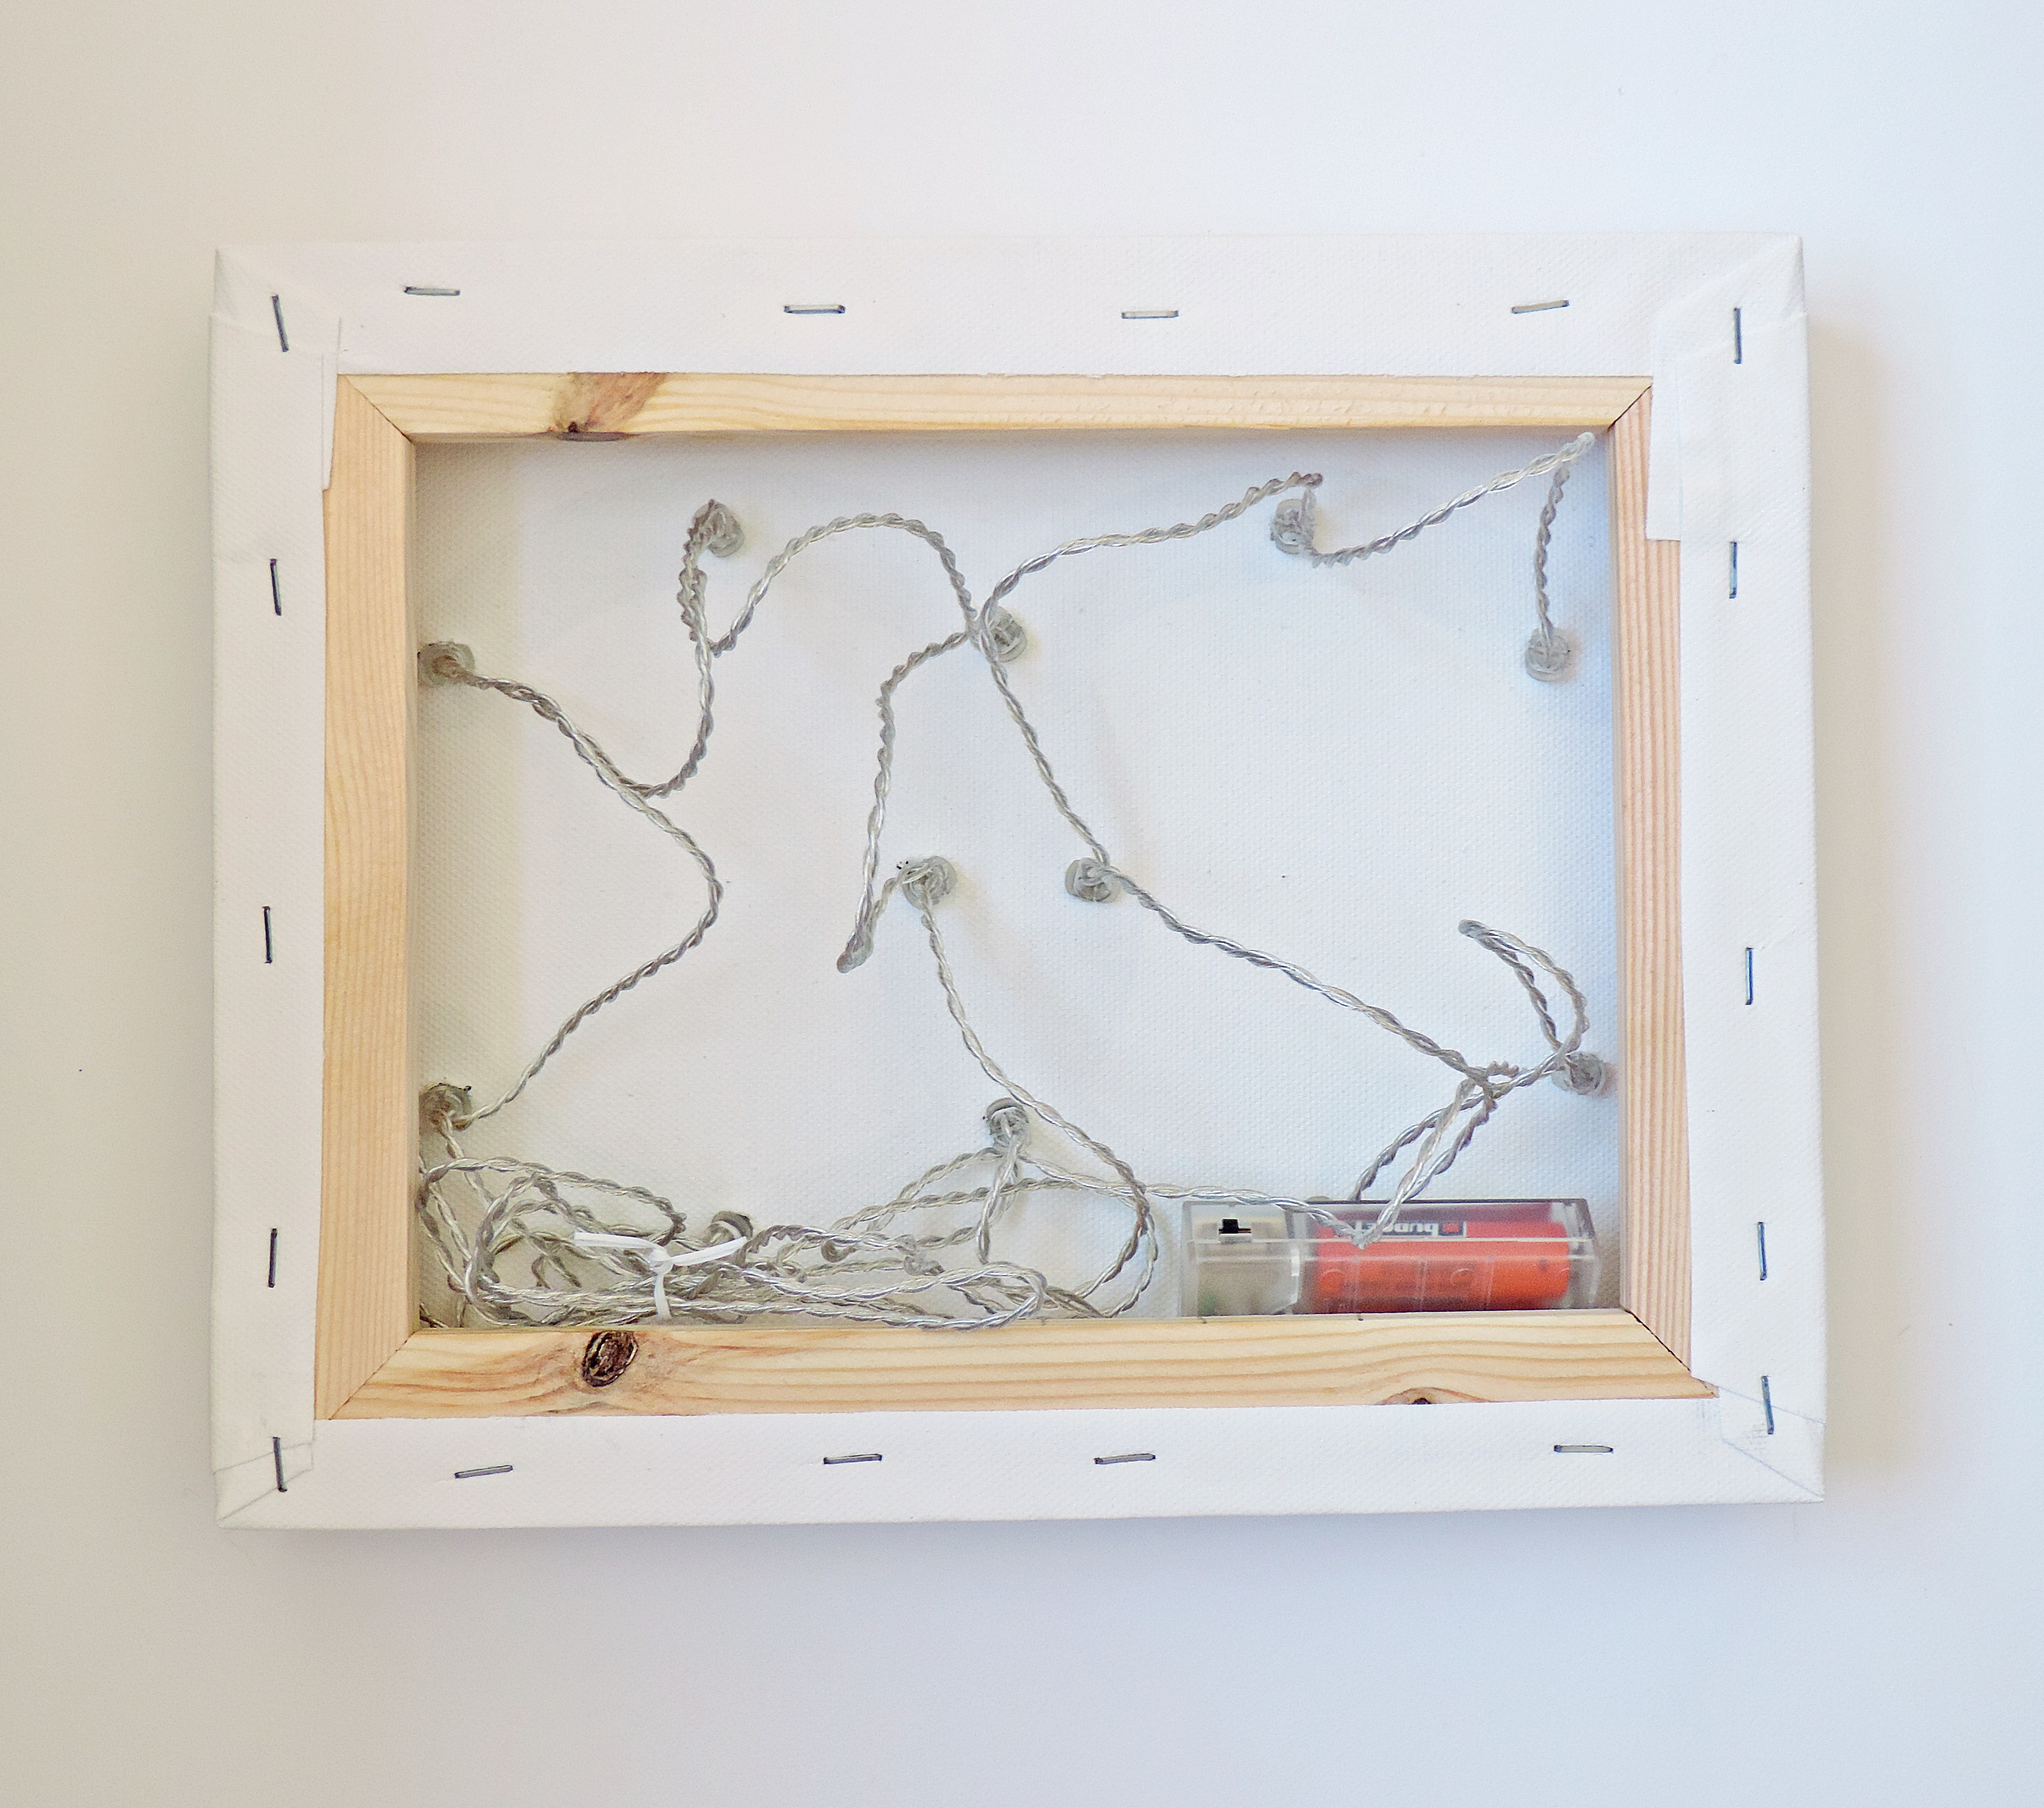
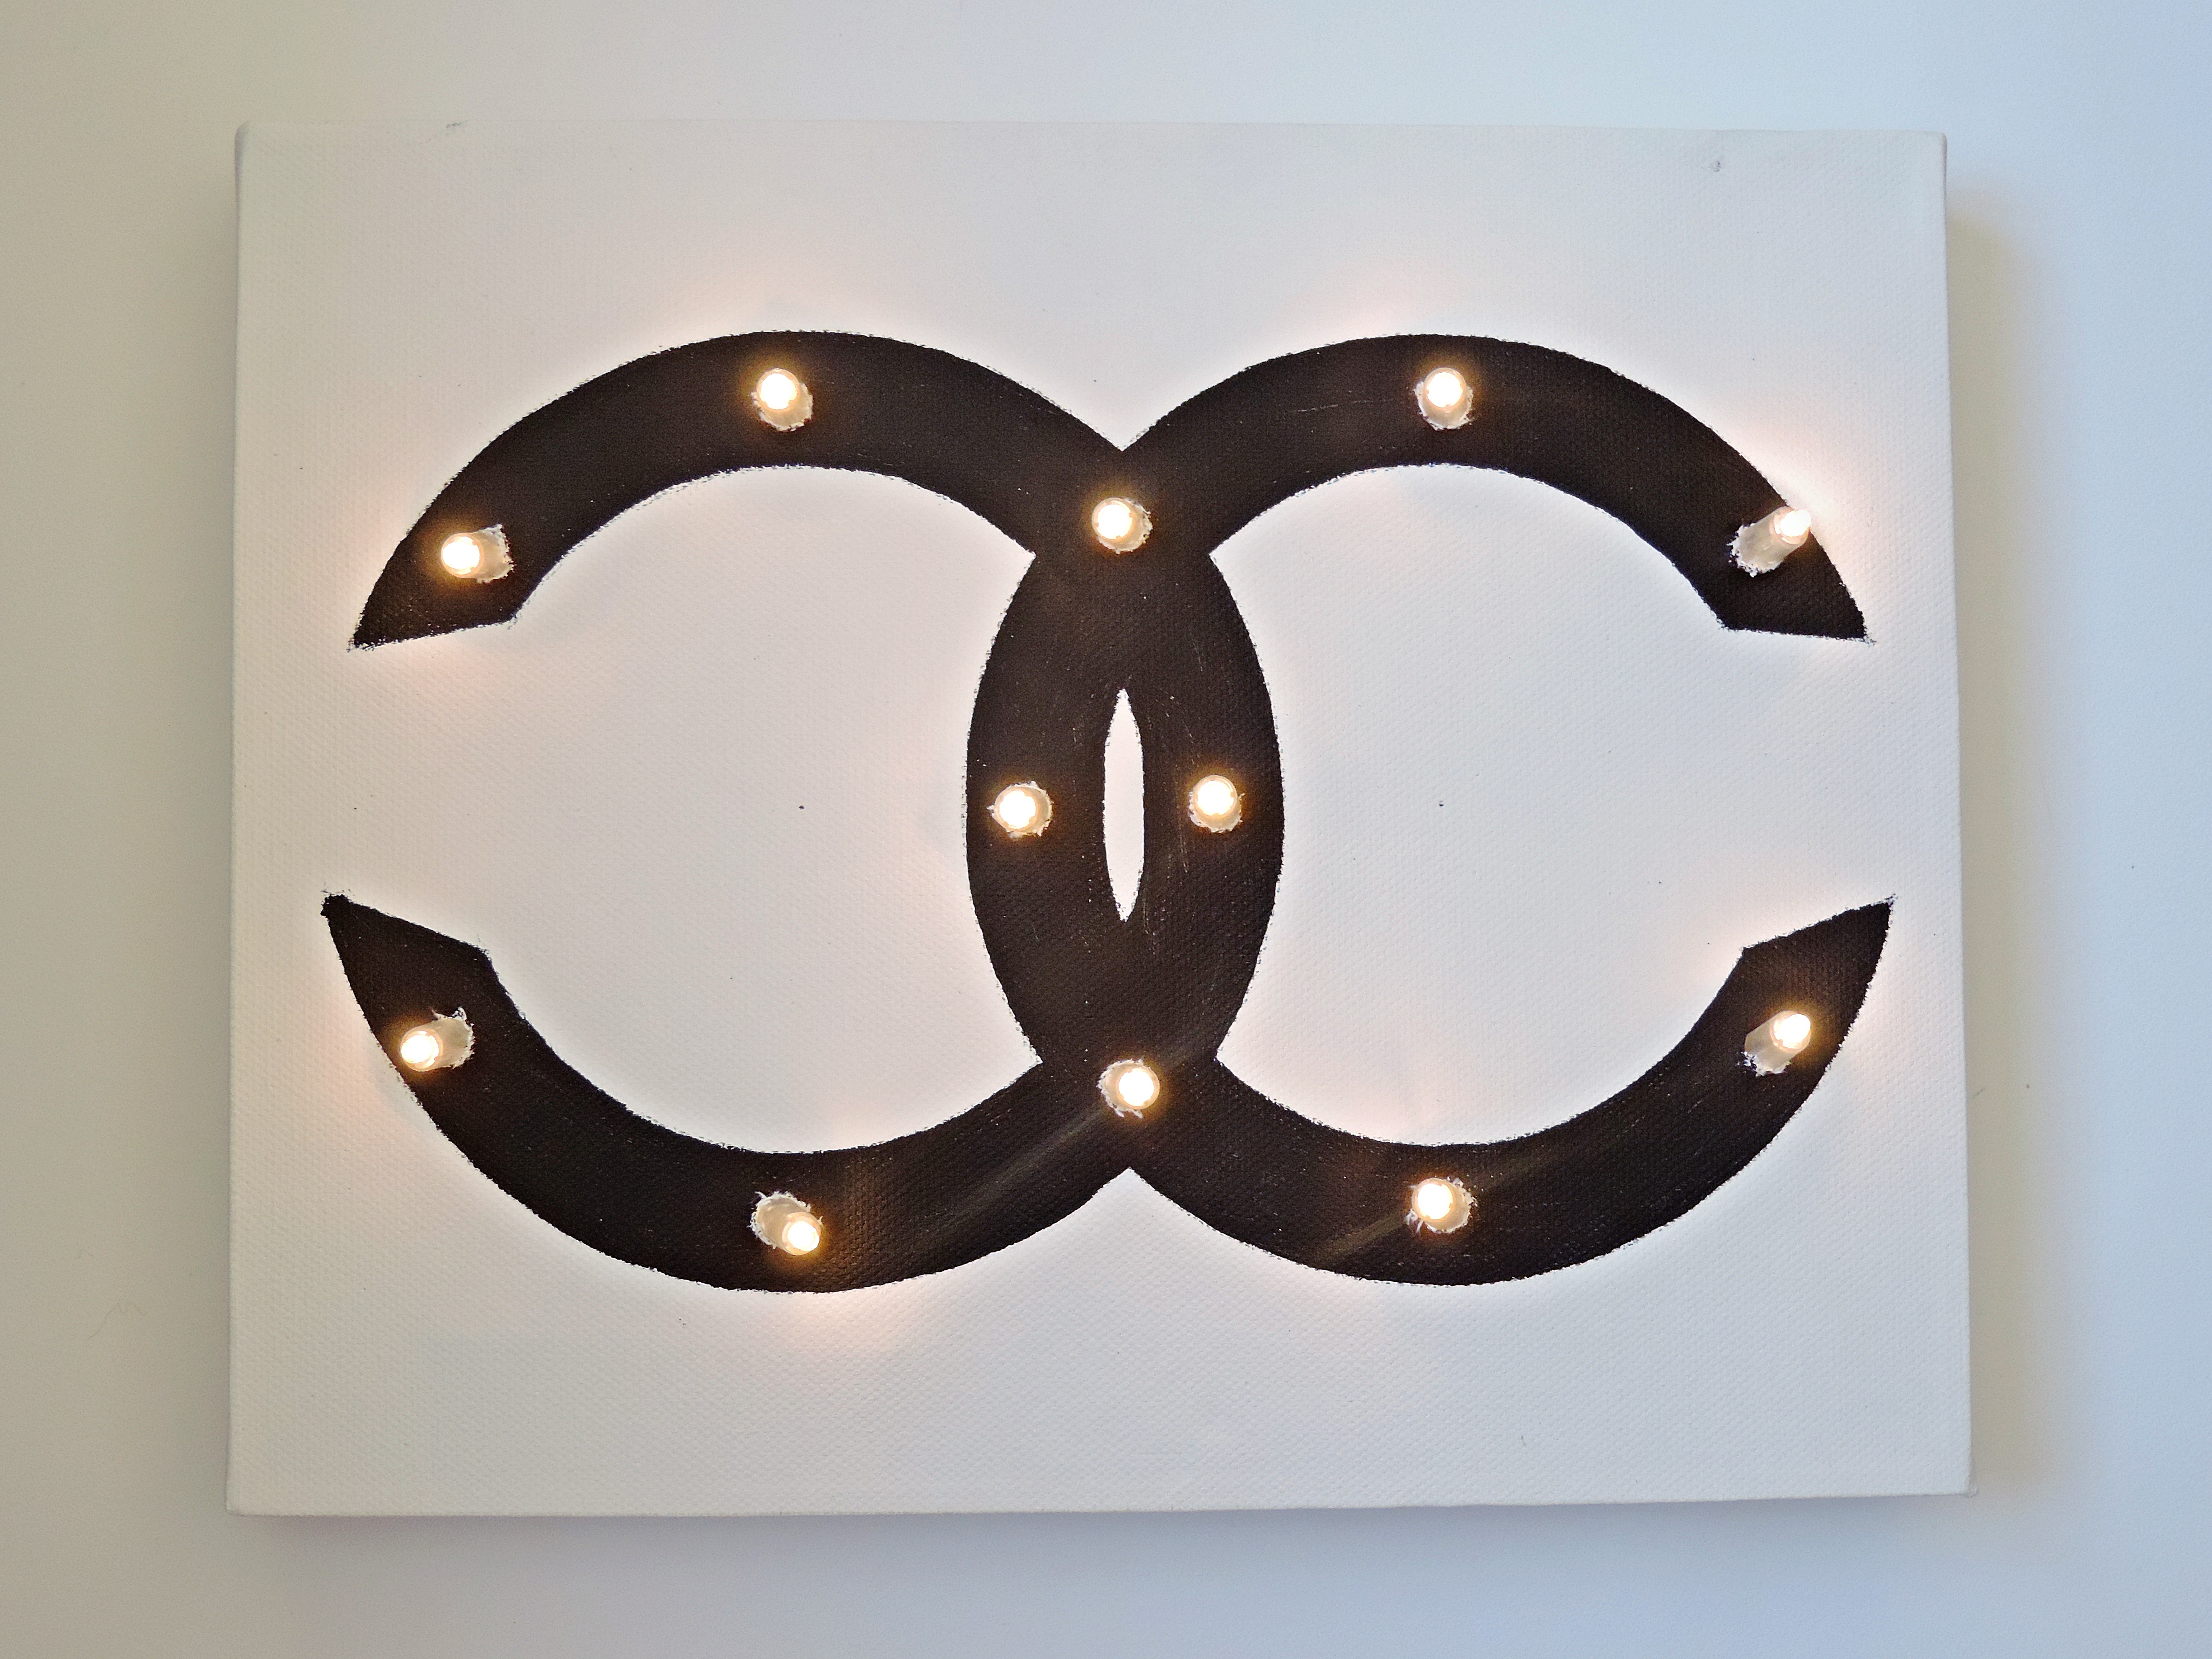
This step is going to be a little harder. Once your painting is completely dry, get your ruler and measure the spots where you are going to put your lights. So if you have 12 fairy lights, you need to space them out equally on the 2 Cs. With your ruler you will measure equal spaces between every two lights. Once you mark the spots, get your scissors and start creating holes on each spot. You need the scissors as the canvas has fibers that you will have to cut. Carefully start creating the holes. I found that using the pointy tip of my pair of compasses and create many tiny holes at first, makes easier for my scissors to cut through the canvas. In order to avoid making your holes too big, try to insert the fairy light and if it barely fits, then your hole is ready. Once you finish all the holes, just push the lights through them and you are done! Last thing is to put batteries and tuck in the cables at the back of the painting so they are not in the way.
I know it is not a major DIY project but I love its simplicity. It is perfect for the bedroom and living room and it adds a touch of “couture” to every space. You can use other logos if Chanel is not your favorite brand but they have to be logos with plain letters and not full words, because in that case you would need a big canvas and more lights. Plus, it would look so cluttered in my opinion. Also you can use whatever colors you like although, no other color expresses Chanel better than black. What do you guys think of the lamp? If you guys create the lamp or something inspired, upload it on Instagram with the hashtag #mycooldiy. I would love to see what you guys have made! Also don’t forget to pop over my Instagram (@blueberrylover) and Twitter (@vickyinlalaland) to say hi!
Till next time take care dolls 😉 xxx
Vicky